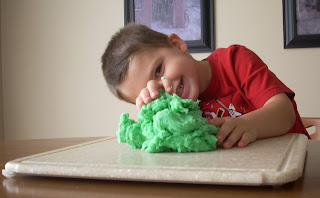
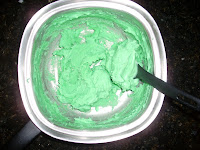
Once again it is time to share a fabulous toddler activity that is both family friendly and fun! I have found a great recipe for homemade play-doh. Let me start off by saying I am a huge fan of play-doh. It is a great hands on activity for little kids. Play-doh is a great way to work on developing fine motor skills.
Fine motor skills work on coordinating small muscle groups. For example, cutting, writing, and manipulating object using ones hands work on these skills. Playing with play-doh is a great way to work on these skills without a lot of muss and fuss.
My son loves to help me out in the kitchen,. He likes to pull up a chair and really dig into whatever the latest project is; so I have been on the lookout for fun cooking projects for us to do where we can get our hands dirty. The problem with cooking projects is the mess they make. Sometimes I feel like the chaos that is my kitchen could use a break, and I could use a break from cleaning it.
The answer to my cooking project problem, a playdough recipe!
I thought that making homemade playdough was going to be a huge mess. Suprisingly it was quick and easy to make. This project was not incredibly messy, nor was there a lot of cleanup afterwards. We did this activity while my youngest was down for his morning nap, so my oldest could have my undivided attention. We had an incredibly fun time creating and playing with this playdough. I will definitely be doing this again!
How to make Homemade Cooked Playdough:
Materials:
· 1 Cup flour
· 1 Cup salt
· 1 Cup water
· 1 Tablespoon of cream of tartar (Cream of tartar will be located in the Spice Aisle of your store.)
· Food coloring
· Pan
· Stove
· Spoon
· Utensils or cookie cutters for manipulating and playing with playdough.
· Plastic bag or plastic container to store playdough in when you are finished playing.
Please note that this is a COOKING project and should be done with an adult.
If you want your playdough to be colored playdough, add food coloring to the water before mixing it with the other ingredients. Mix the flour, water, salt, and cream of tartar in a pan.
An ADULT should then place the pan on the stove over a low heat and stir until the playdough forms a ball.
Next, remove the playdough from the stove and pour the ball onto a table/countertop/cuttingboard and knead the playdough until it is smooth and pliable. (The playdough should not be hot, it should be warm.)
The playdough is now ready for little hands to start exploring! Take out the utensils and/or tools for some playdough exploration and manipulation. Remember that you do not have to have fancy Play-doh toys for this activity; cookie cutters, utensils, rolling pins, and many other kitchen gadgets can be used with this activity. We already owned Play-doh tools, so we used those. But they are not a necessity for this project. Please use common sense when choosing the tools your child will be using for this activity. A large sharp knife for example is NOT appropriate, spoons are.
Once you are done playing with the homemade playdough you can store it in a platic container or a plastic ziploc bag. I have heard that homemade playdough lasts longer than store bought playdough. I cannot attest to this quite yet, but I will let you know how long this batch lasts me.
We created pretend food and then switched to making vehicles out of the playdough. The possibilities are endless. The only limit is your imagination.
We created pretend food and then switched to making vehicles out of the playdough. The possibilities are endless. The only limit is your imagination.
This is a great activity! It is a no muss no fuss easy breezy family friendly craft that I will be doing again. The only thing that I did not have on hand already was the cream of tartar, everything else was already on my shelves and ready to use. I am to make some more homemade playdough. Maybe this time I will get to choose the color.
I hope you enjoy this activity as much as we did!
Written by: Laura Andry


